How Do I Add an Attachment?
The Attachments tab allows you to upload documents to submit with your project application. Attachments that may be required for your project include (but are not limited to):
- consent form/information sheets
- permissions/approval letters from external organizations
- recruitment materials (scripts, posters, online correspondence, etc.)
- data collection materials
- participant materials (handouts, thank you forms, agreement to participate in research for minors, etc.)
- confidentiality agreement templates
- TCPS2: CORE completion certificate
Accepted File Formats
- Portable Document Format (.pdf)
- MS Word (.doc/.docx)
- MS Excel (.xls/.xlsx)
- MS PowerPoint (.ppt/.pptx/.pps/.ppsx)
- Text Document (.txt)
- JPEG image (.jpeg/.jpg)
- Graphic image (.png/.gif)
Note: Compressed files (.zip, .7z, etc.) are not accepted; please upload each file individually.
All files must be labelled appropriately. If an application is submitted with any other type of attachment or without labels/descriptions, the application will not be reviewed and will be returned to the researcher to convert the attached file to an acceptable format. This will delay the review of your application.
How to Add an Attachment to your Application:
- From the Attachments tab, select the Add Attachment button (see Figure 1).
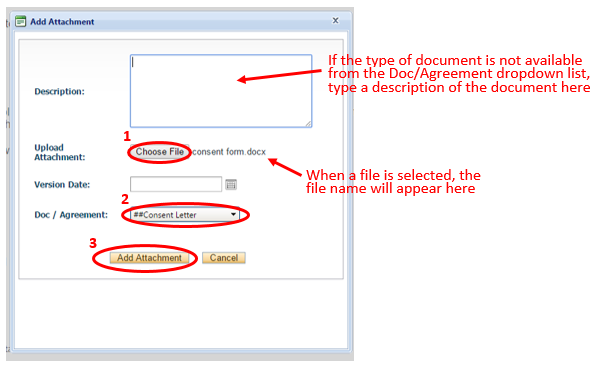
- Select the Choose File button and browse to find the attachment on your hard drive or network drive, then choose a document type from the Doc/Agreement dropdown list (if the document type is not available, type a description of the document). Then select the Add Attachment button (see Figure 2).
Figure 1: Add an Attachment to the Application
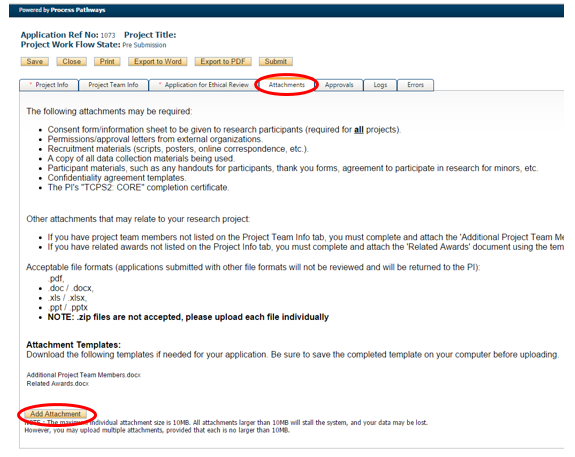
Figure 2: Browse for Document and Specify the Document Type
After the document is attached, you will see it listed at the bottom of the Attachments tab (see Figure 3). You can edit the description or the doc/agreement category by selecting the Edit button. You may also delete a document by selecting the Delete button.
Figure 3: Document Attached to Application

Note: For an accessible format of this content, please contact research@ontariotechu.ca